
How to Use Ikonizer
Introduction
Ikonizer is a powerful web-based tool designed to solve common problems with SVG icons. Whether you're dealing with messy export names from Figma, need to batch edit SVG properties, or want to generate optimized sprite sheets, Ikonizer simplifies your workflow.
Clean Figma Names
Transform messy Figma exports like icon=search, style=outlined.svg into clean, usable filenames.
Batch Edit Properties
Simultaneously remove or modify attributes like fill, stroke, width, and height across multiple SVG files.
Icon Libraries
Import icons from popular libraries like Feather, Bootstrap, FontAwesome, and more.
SVG Sprites
Generate optimized SVG sprite sheets that improve performance for web projects.
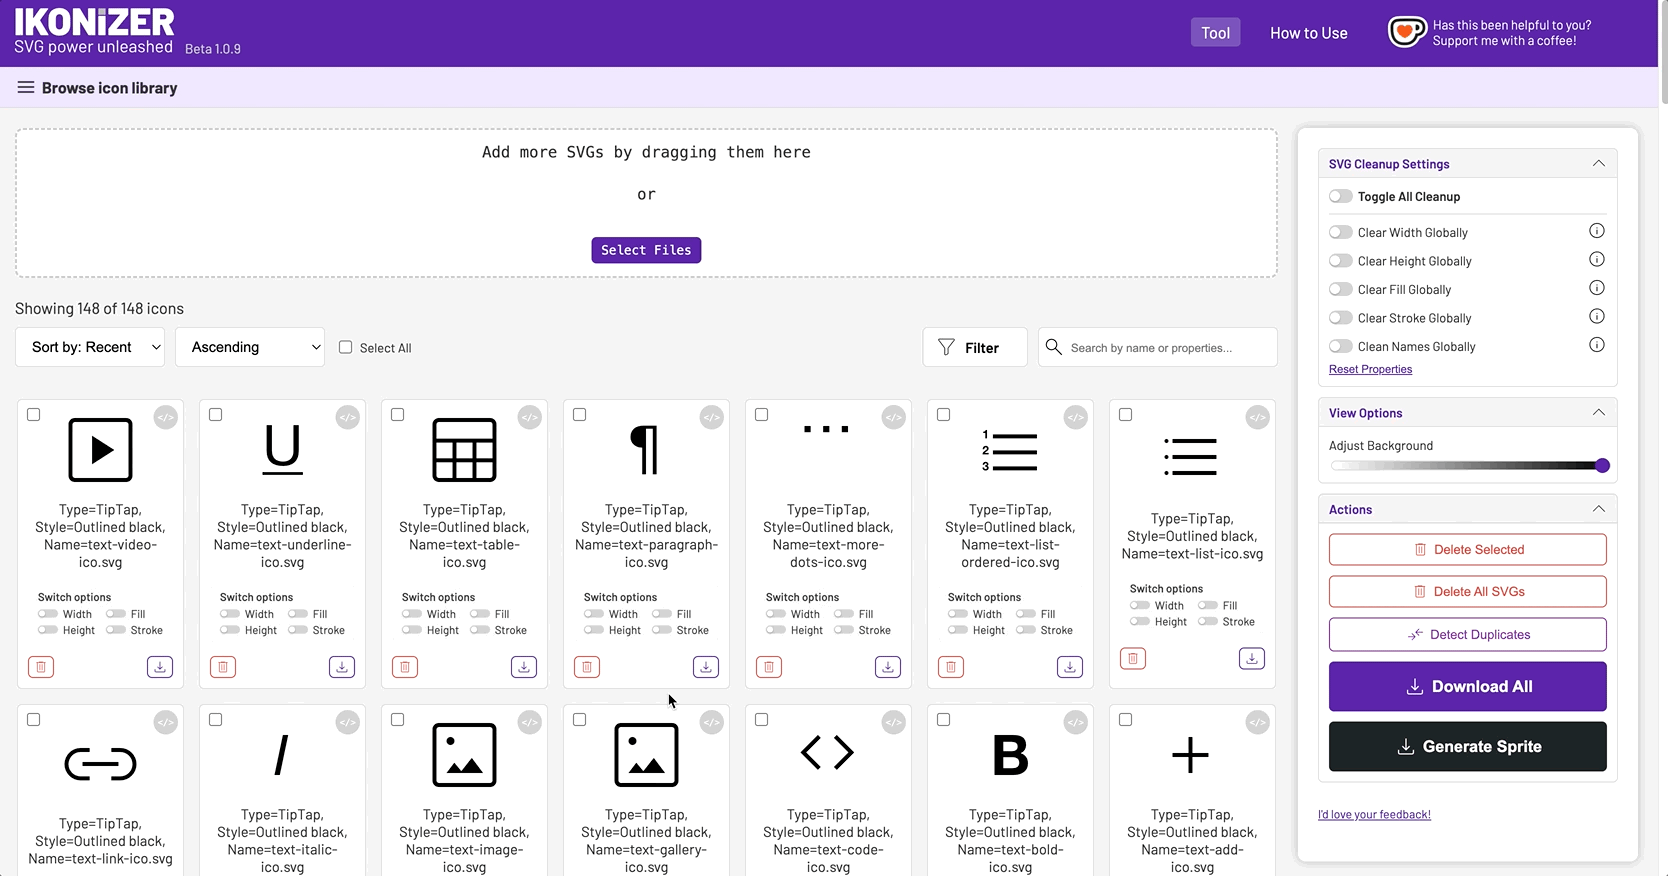
Cleaning Figma Names
The Problem
When exporting SVG icons from Figma, filenames often include parameter variations like:
icon=search, style=outlined, size=24.svg
These names are difficult to work with and require manual renaming.
The Solution
Ikonizer automatically cleans these names by extracting the meaningful part from the parameter order, creating simple, consistent filenames.
How to Clean Figma Names
Import Your SVG Files
Drag and drop your SVG files exported from Figma into the Ikonizer drop zone, or click "Select Files" to choose them from your computer.
Enable "Clean Names Globally"
In the SVG Cleanup Settings panel on the right, enable the "Clean Names Globally" option by toggling the switch.
See the Results
Your icon names will be automatically cleaned. Ikonizer extracts the value from the last parameter in the name:
- Before:
icon=search, style=outlined, size=24.svg - After:
24.svg
For best results with Ikonizer, organize your parameter order in Figma to put the most important identifying information last:
- Recommended format in Figma:
size=24, style=outlined, icon=search.svg - Result after cleaning:
search.svg
This way, Ikonizer will extract the most meaningful part of the name (the icon name itself) instead of size or style information.
Pro Tip
When setting up your export in Figma, organize your parameters with the most important identifier (usually the icon name) as the last parameter. For example: size=24, style=outlined, icon=search.svg will clean to search.svg.
Another Pro Tip
If you have icons with identical names after cleaning, Ikonizer will detect duplicates and give you options to rename or overwrite them.
Batch Editing Properties
The Problem
SVG files often contain hardcoded attributes like fill colors, stroke widths, and fixed dimensions that limit their flexibility in web projects.
The Solution
Ikonizer allows you to batch remove or modify these properties across all your icons at once, making them more adaptable for web use.
How to Batch Edit SVG Properties
Import Your SVG Files
Load your SVG icons into Ikonizer by dragging and dropping them or using the file selector.
Choose Properties to Modify
In the SVG Cleanup Settings panel, toggle the switches for the properties you want to remove:
- Clear Width Globally: Removes width attributes to allow dynamic scaling
- Clear Height Globally: Removes height attributes
- Clear Fill Globally: Removes fill colors to enable CSS styling
- Clear Stroke Globally: Removes stroke attributes for CSS control

Apply Changes
The changes are applied automatically to all icons in your workspace. You can toggle the options on and off to see the effects in real-time.
Download Modified Icons
Once you're satisfied with the changes, click "Download All" to save your modified SVG files, or "Generate Sprite" to create a sprite sheet (more on this later).
Pro Tip
For more selective editing, you can filter icons by their properties and edit specific groups. For example, edit only icons with a specific fill color or dimension.
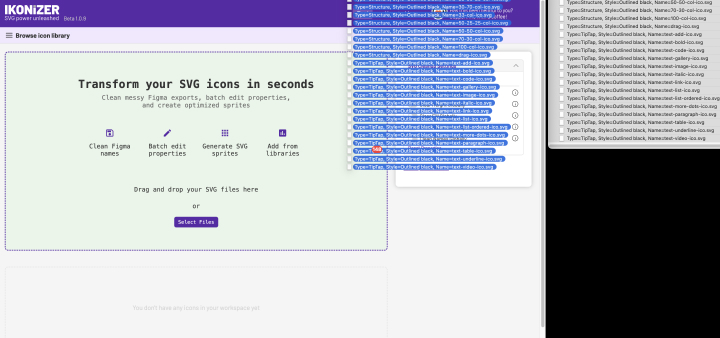
Using Icon Libraries
The Problem
Creating a comprehensive icon set often requires combining custom icons with standard icons from popular libraries, which can be time-consuming to download and organize.
The Solution
Ikonizer integrates with popular icon libraries, allowing you to browse and add standard icons directly to your workspace.
How to Use Icon Libraries
Open the Library Browser
Click on "Browse icon library" at the top of the page to open the library browser panel.

Select a Library
Choose a library from the dropdown menu. Ikonizer supports:
- Feather Icons
- Heroicons (Outline & Solid)
- Bootstrap Icons
- FontAwesome (Brands, Regular, Solid)
- Lucide Icons
- Material Icons
- Remix Icons
Browse and Select Icons
Browse through the icons displayed in the library. You can use the search function to find specific icons by name.
Click on icons to select them (selected icons will be highlighted).
Add to Your Workspace
Click "Add selected icons" to add only the icons you've selected, or "Add all icons from library" to import the entire library.
The selected icons will be added to your workspace alongside any custom icons you've uploaded.
Pro Tip
You can combine icons from multiple libraries by repeating the process with different library selections. This makes Ikonizer a powerful tool for creating comprehensive icon sets that blend multiple styles.
Generating SVG Sprites
The Problem
Using individual SVG files can increase HTTP requests and slow down website loading. Managing multiple icon files can also be unwieldy for developers.
The Solution
SVG sprites combine multiple icons into a single file that can be referenced throughout your website, reducing HTTP requests and simplifying asset management.
How to Generate SVG Sprites
Prepare Your Icons
Import and edit your SVG icons as described in previous sections. You can combine custom icons with library icons.
For optimal sprites, it's recommended to clean up properties like fill and stroke to allow CSS styling.
Generate the Sprite
Click the "Generate Sprite" button in the Actions panel.
Download Your Sprite
The sprite will be automatically downloaded as a single SVG file containing all your icons as symbol definitions.
Using the Sprite in Your Project
To use the sprite in your HTML, include the SVG file once, then reference individual icons using the following pattern:
<svg>
  <use xlink:href="sprite.svg#icon-name"></use>
</svg>
Replace "icon-name" with the name of the specific icon you want to display.
Pro Tip
You can filter and select only specific icons before generating a sprite. This is useful for creating themed sprite sheets (e.g., navigation icons, action icons) that can be loaded selectively on different pages.
Advanced Tips
Filtering and Sorting
Use the filter and sort options to manage large icon sets:
- Filter by properties like fill, width, height, and stroke
- Sort alphabetically or by property values
- Use the search function to find specific icons by name or property
Editing Individual Icons
Click the "Edit" button on any icon to access its raw SVG code and make precise edits to individual icons when needed.
Duplicate Detection
Use the "Detect Duplicates" feature to find icons with identical content, helping you maintain a clean and efficient icon library.
Background Toggle
Adjust the background brightness using the slider in the View Options panel to better visualize icons with different fill colors.
Ready to Transform Your SVG Workflow?
Try Ikonizer now and see how it can streamline your icon management process.
Get Started